When a potential customer discovers your home bakery on Instagram, you have roughly three seconds to convince them that you are a premium, trustworthy professional.
If your grid is a chaotic mix of blurry late-night kitchen photos, cakes photographed under harsh yellow stove lights, and graphics with ten different fonts screaming about a holiday pre-sale, that customer will likely keep scrolling. A disorganized feed subconsciously signals disorganized service.
Conversely, a stunning, cohesive Instagram aesthetic transforms your profile into a high-end digital bakery window. It is the single fastest way to justify premium pricing. People naturally assume that a cake that looks expensive in a photograph is worth paying $200 for in reality.
You do not need a professional DSLR camera or a photography degree to achieve this. You only need a modern smartphone, a fundamental understanding of lighting, and strict visual discipline. Here is how to build the perfect Instagram aesthetic for your home bakery.
Master the Lighting (The Single Most Important Rule)
If you only take away one lesson from this entire guide, let it be this: Never photograph your cakes under the harsh yellow or fluorescent lights of your kitchen at night.
Overhead artificial lighting creates aggressive shadows, reflects unpleasantly off glossy buttercreams, and casts a sickly, artificial yellow hue over your entire product.
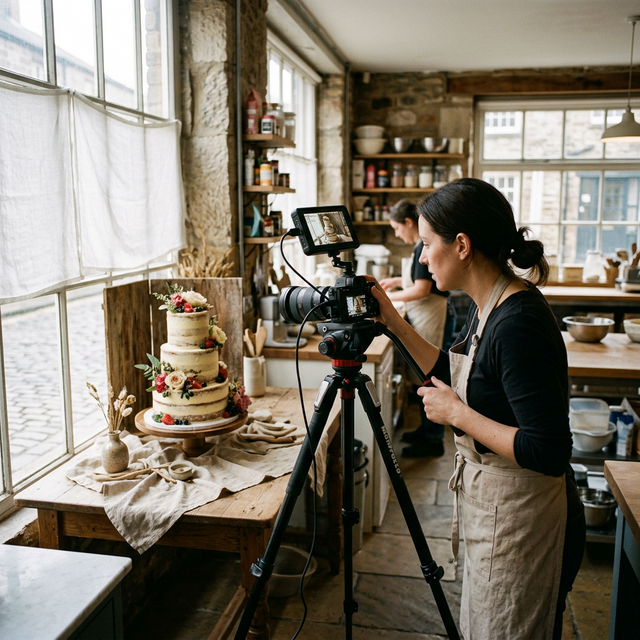
The Solution: Indirect Natural Daylight
- Find the largest window in your house.
- Set up a small table immediately next to it.
- Turn OFF every artificial light in the room (lamps, overheads).
- Wait for the right time of day. You want soft, indirect sunlight pouring through the window (not a harsh beam of direct sunlight hitting the cake like a laser).
- Position the cake so the window is to the side (side-lighting highlights the texture of your frosting beautifully).
If you must finish cakes at 11:00 PM, wait until 9:00 AM the next morning to photograph them before boxing them for delivery. The difference in quality is astronomical.
Choose a Consistent Core Aesthetic
Your grid needs a unifying theme so that when a user scrolls scrolling, the images feel like they belong to the same brand family. Pick one aesthetic and commit to it strictly for at least three months.
- The "Bright & Airy" Aesthetic: Crisp white backgrounds, pastel cakes, light marble surfaces, and airy shadows. Excellent for wedding cake specialists and modern, minimalist bakers.
- The "Moody & Artisanal" Aesthetic: Dark slate or distressed wood backgrounds, deep dramatic shadows, rich colors (dark chocolates, deep reds). Perfect for rustic sourdough bakers, fine-dining pastries, or avante-garde wedding cakes.
- The "Colorful & Pop" Aesthetic: Solid, brightly colored seamless paper backgrounds (millennial pink, bright teal), high contrast, fun props (sprinkles, confetti). Ideal for maximalist birthday cakes, neon designs, or massive gourmet cookies.
The Power of the Backdrop
You do not need an actual marble countertop or a rustic farmhouse table to take beautiful photos. Most professional food photographers shoot on completely fake, portable backdrops.
Invest $40 in double-sided, high-quality vinyl photography backdrops (brands like Replica Surfaces or cheap alternatives on Amazon). They are waterproof, grease-proof, and roll up flat when you are done.
Buy two: one to place flat on the table (the base) and one to prop up vertically behind the cake (the wall). You instantly have a pristine, distraction-free "studio" that hides your messy kitchen.
Styling and Props (Less is More)
The cake must always be the undisputed hero of the photograph. If the viewer’s eye is immediately drawn to a cluttered vase of flowers or a busy patterned tablecloth, you have failed the shot.
- The Rule of Thirds: Use the grid feature on your phone’s camera. Do not always place the cake dead center. Sometimes placing it slightly to the left gridline creates a more dynamic, editorial feel.
- Minimalist Props: Subtlety is key. If you are photographing a strawberry cake, place three fresh, perfectly clean strawberries casually near the base of the cake stand. Add a beautiful, neutral linen napkin or a high-end offset spatula.
- Negative Space: Do not fill the entire frame with cake. Leave empty space (negative space) in the upper half of the photo. It makes the image feel luxurious and allows room if you ever need to overlay text for an advertisement.
Curating the Grid
Your Instagram profile grid is nine squares of real estate. Do not post nine straight, identical, zoomed-in shots of different cakes in a row. It looks overwhelming.
Instead, pace your visual rhythm like a magazine layout:
- Square 1: A clean, wide shot of a finished tiered cake.
- Square 2: A behind-the-scenes (BTS) video of you smoothing buttercream (humanizes the brand).
- Square 3: An extreme macro close-up of a delicate piping detail or an amazing cake cross-section (the "crumb shot").
- Square 4: A beautifully designed graphic featuring a customer testimonial.
Action Item: Use a free visual planning app (like Planoly or Preview) to arrange your photos before you post them. If two dark photos are sitting on top of each other and ruining the grid's balance, you will see it in the planner first.
Moving Them From the Grid to the Sale
An aesthetic Instagram gets people's attention. The mistake home bakers make is believing that attention naturally guarantees an organized sale.
If your gorgeous photography generates a flood of eager customers, but your only intake method is chaotic, unorganized DMs asking "how much," your aesthetic will eventually collapse under administrative burnout.
You must pair your premium aesthetic with a premium ordering experience. When a customer is awed by your photos, point them to your professional link-in-bio. Using a structured platform like CakeVision ensures that the beautiful visual journey on Instagram ends with a seamless, AI-assisted, and organized ordering flow, proving you are every bit the professional your grid implies.
Ready to let customers design their cake?
Set up your AI-powered cake design tool in under 3 minutes. Free to start.
Start FreeFAQ
Should I use Instagram filters on my cake photos?
Absolutely not. Built-in Instagram filters severely degrade the resolution of the image and heavily distort the color grading. If a customer orders a cake expecting the "dusty rose" color they saw in a heavily filtered photo, and the real cake is pale pink, you will have a furious client. If you must edit, use a dedicated app like Lightroom Mobile strictly to adjust basic brightness and contrast, not to fundamentally alter the colors.
Do I need to buy a $1,000 professional camera to look premium?
No. While full-frame DSLR cameras offer superior depth-of-field, the cameras equipped on the latest flagship smartphones (iPhone Pro, Samsung Galaxy S series) are incredibly powerful. A clean, well-composed phone photo taken in beautiful, soft, natural window light will completely destroy a photo taken with a $3,000 professional camera in a dark, yellow-lit kitchen. Lighting beats gear every time.
How often should a home bakery post on Instagram?
Consistency is dramatically more important than frequency. Posting an excellent, high-quality photo or reel three days a week is vastly superior to posting seven mediocre, blurry photos every single day just to "feed the algorithm." Focus on high-quality outputs that truly highlight your craftsmanship and use your Stories for the messy, frequent, daily updates.


